Hacking Passbook, the Real Way to do Extreme Couponing

With the release of iOS 6, Apple introduced the Passbook application. Currently there are sixteen different applications that support Passbook integration. The purpose of the Passbook application is to provide a one-stop application to manage all of your coupons, loyalty/gift cards, and tickets/boarding passes. This all sounds great, but what happens when an attacker abuses this service to get discounts or to access other peoples’ gift cards. This blog will show you how easy it is to intercept Passbook passes, modify them, and redeploy them to the Passbook application. The Passbook passes are typically generated by applications at the user’s request. The user tells the application that they want their coupon/ticket/etc. in their Passbook and the application calls out to its Passbook server. At this point, the Passbook server generates the pass and sends it back to the app to pass on to the user.
How can we break it?
Now there are already multiple services available that will generate Passbook passes for you. I’m not going to cover those here, as they have their own ways of creating passes and that’s not what we’re looking to do. In this blog, you’ll see how you can intercept a Passbook .pkpass file from the source and modify it for your own uses.
How to intercept the pass
The easiest way to intercept the Passbook URLs and/or files is by using a proxy. I have Burp Proxy set up on a laptop to intercept web traffic from my iPhone. Once you identify the Passbook request URLs (assuming the application uses HTTP for requests), you can easily replay the request (in a browser) from the intercepting host to get the .pkpass file. Additionally, you could sniff out wireless traffic from your wireless network and identify Passbook requests.
Deconstructing the .pkpass
Plain and simple, .pkpass files are zip files. All you have to do to access the internal files is unzip the file. Once unzipped, the three required files contained in the .pkpass folder are:
- manifest.json (generated by Apple’s signpass tool)
- pass.json (contains the Passbook pass data)
- signature (a signature file for integrity
Additional image files may be in the folder to be used by the pass (icon.png, thumbnail.png, strip.png), but those are all considered optional. If you are looking at an intercepted pass file, you will most likely find additional images used for the pass.
The most interesting file is the pass.json file. A sample of the pass.json:
{ "passTypeIdentifier":"pass.com.ACME. MobileCoupon", "formatVersion":1, "organizationName":"ACME Corporation", "serialNumber":"ABCDX-12345", "teamIdentifier":"A9BKD012", "logoText": "", "description":"ACME coupons.", "webServiceURL":"https://PASSBOOKServer.com/passbook/", "authenticationToken":"123456789123456789123456789", "suppressStripShine" : 1, ], "locations":[ {"latitude" : 44.989893, "longitude" : -93.279087} ]
Here are the important parts that you need to modify, if you’re going to regenerate your own pass.
- passTypeIdentifier
-This will later be changed to your Identifier (see below) - teamIdentifier
– This will also get changed to yours (also see below) - webServiceURL
– You may just want to remove this one (otherwise the pass may phone home for updates) - authenticationToken
– You may also want to delete this as well (it’s not going to get used by anything)
How to create your own passes with signpass
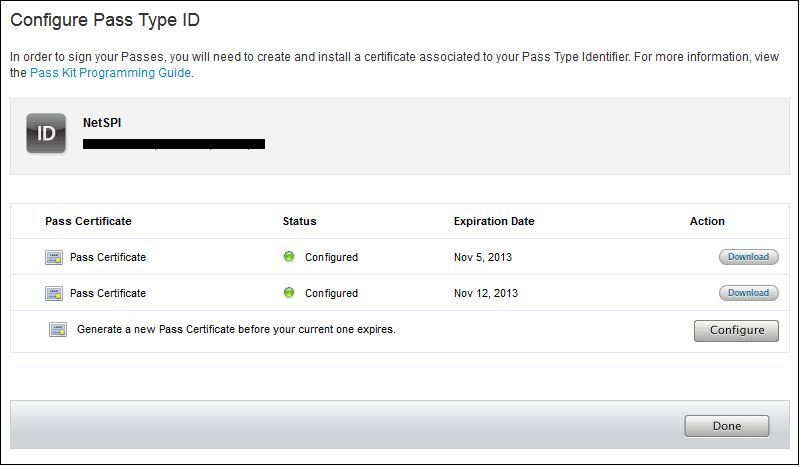
At this point, I’m going to assume that you’re using a Mac to generate your passes. You can do this from Windows, but it’s a little more complicated (and a possible future blog post). Get yourself an iOS developer account with Apple. It’s $99 and you actually get some interesting stuff with it (assuming you’re into iOS). Once you have an account, you need to create a “New Pass Type ID” from the iOS Provisioning Portal. This pass type ID will be used by the pass.json file as the passTypeIdentifier and the teamIdentifier. You can follow the steps on Apple’s site to create the ID. Open the “configure” action on the Pass Type ID page and download the pass certificate. Once you download your certificate, install it to your OSX keychain and you should be good to sign your own passes.
The Apple developers site has the Passbook SDK available that contains the signpass application for generating .pkpass files. The SDK actually provides several example passes that you can generate on your own for testing. In order to generate the actual .pkpass files, you will need to compile the signpass application in Xcode (the project is in the SDK files). This can be a pain if you’re not familiar with Xcode. Basically, you build the application in Xcode, click on “Products” (on the left), right click on signpass, and click “Show in Finder.” This will bring you to the compiled application, where you can copy it out to your Passbook directory.
Once you’ve compiled the signpass application, you can use it to generate the manifest.json and signature files. The application will also zip all the files into the .pkpass file. You can use your intercepted file that you unzipped earlier, but you will want to delete the signature and manifest.json files before you try and recreate the .pkpass file. You will also want to modify the pass.json parameters (passTypeIdentifier and teamIdentifier) to match the certificate you just downloaded from Apple. Finally, since you’re working on a Mac, you need to delete any .DS_Store files that get created in your .pkpass folder. If there is a .DS_Store file in the folder and it isn’t caught by the manifest.json file, your pass will not be valid on the phone.
Here’s an example of the .pkpass creation:
{ NetSPIs-MacBook-Pro:netspi NetSPI$ ./signpass -p NetSPI.raw/ 2012-11-12 15:00:04.512 signpass[945:707] { "icon.png" = 575b58cc687b853935c63e800a63547a9c54572f; "icon@2x.png" = dbfca47b69c6f0c7fc452b327615bc98d7732d33; "logo.png" = d360269292d8cfe37f5566bba6fb643d012bef84; "logo@2x.png" = cdd3c98dd3044fe3d82bcea0cca944242cdcc6bf; "pass.json" = f72d3d597c7fc9d1f2132364609d32c9890de458; "strip.png" = b9f823da6eefc83127b68f0ccca552514803ed1f; "strip@2x.png" = 319991c69de365c0d2a8534e0997aea01f08d3eb; "thumbnail.png" = a68cc65e48febb6e603682d057d4e997da64a6a5; "thumbnail@2x.png" = 7ec0e3c38225fea3a5b0dbb36d7712c27b8b418f; }
Sending passes via email or web
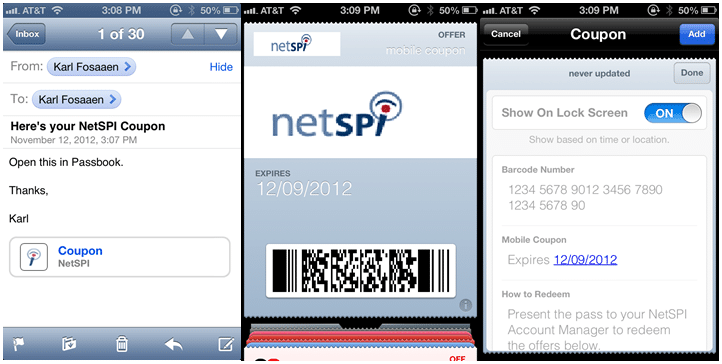
The easiest way to deploy your newly created pass is through email. A properly signed .pkpass file should show up in your iOS mailbox as a Passbook pass without any issue. Additionally, .pkpass files can be downloaded from a web server that has support for serving .pkpass files.
Conclusions
The primary risk that I see with intercepting Passbook files is fraud. Someone could potentially modify a pass to try and get a discount at a store, or maybe gain access to someone else’s rewards account. This can easily be stopped by using strong controls on the business’s side, but there’s always a risk of social engineering. For those developing Passbook integration for their applications, make sure all of your pass files are sent over securely encrypted channels and ensure that your business has strong controls to prevent tampering with Passbook passes.
For those that would like a copy of the NetSPI pass shown above, email me karl.fosaaen@netspi.com.
Explore More Blog Posts

Bypassing Microsoft Entra Conditional Access Policies via Nested App Authentication
Discover how attackers bypassed Microsoft Entra Conditional Access Policies using Nested App Authentication (NAA) flows in this technical vulnerability breakdown.

I’m Just Asking Questions: Social Engineering as a Reporter
Dive into this real-world social engineering assessment where a fake anonymous tip and an adversary-in-the-middle framework tested the limits of an organization's security policies.

Beyond the Hype: What Regulated Industries Need to Know Before Trusting AI Security Tooling
AI security tools can build an attack, but enterprise security teams in regulated industries need consistency, auditability, and predictable costs before they can trust one. Learn why the surrounding infrastructure is where most AI security vendors are still falling short.