Reverse Engineering iOS Applications in a Fun Way
Analyzing iOS application files to manipulate objective C functions is not a trivial process. The most common way to perform reverse engineering is by class dumping ipa files to discover all the class names and methods present in an application. This can be done using Cycript. Cycript is present within Cydia, and Cydia is installed by default when we jailbreak an iOS device.
A common way to manipulate the run time environment is by calling methods present within an application. Any process can be hooked with Cycript using the following steps:
- Attach to the process using Cycript
- Print all the method and class names
- Replacing existing Objective-C methods using MobileSubstrate framework.
A more technical and step by step process to perform the above process is given on the iPhone Dev Wiki.
The most difficult and time consuming part is recognizing the classes and the objects used to call required methods. The traditional approach is to perform a class dump of the binary to get the methods that can be invoked.
We can use ‘Crackulous‘ to dump out the unencrypted version of the application and use ‘class-dump-z‘ to spit out the method names present in the _OBJC segment. There are also a couple of tools (iNalyzer and Snoop-it) that save a lot of time and perform reverse engineering and function hooking for the entire application.
I have analyzed the TWCSportsNet application in this blog. The reason why I choose this application is because it has two security controls implemented. It does not work if the following conditions are not met:
- The device is a non jailbroken device.
- The live streaming option is not available for any other region except Southern California and Nevada.
We will bypass those restrictions by using two modern tools called iNalyzer and Snoop-it.
iNalyzer:
iNalyzer is a handy tool developed by AppSec Labs. It creates an entire mapping of the application and dumps outs a doxygen script which is used to create an html page that shows all the method and class names. It also creates a graphical view of classes and functions using Graphviz.
In order to use this, we have to download a client side application on a jailbroken device. When the application is started, it will create a web listener on port 5544. We can connect to the port through our laptop by visiting https://iphoneIPaddress:5544.
Next we point iNalyzer to the application that we want to reverse engineer. iNalyzer will extract the entire application and create a zip file. After unzipping the file, there is a dox.template file present in appname/ Payload/Doxygen/ folder. This file can be given as an input to Doxygen and it will output an html file that consists of the mapping of the entire application.
Limits of iNalyzer:
It does not let us dynamically analyze the work flow of the application. For example, if we click a send button on an iOS application, we do not get to see the classes and the various methods that will be invoked.
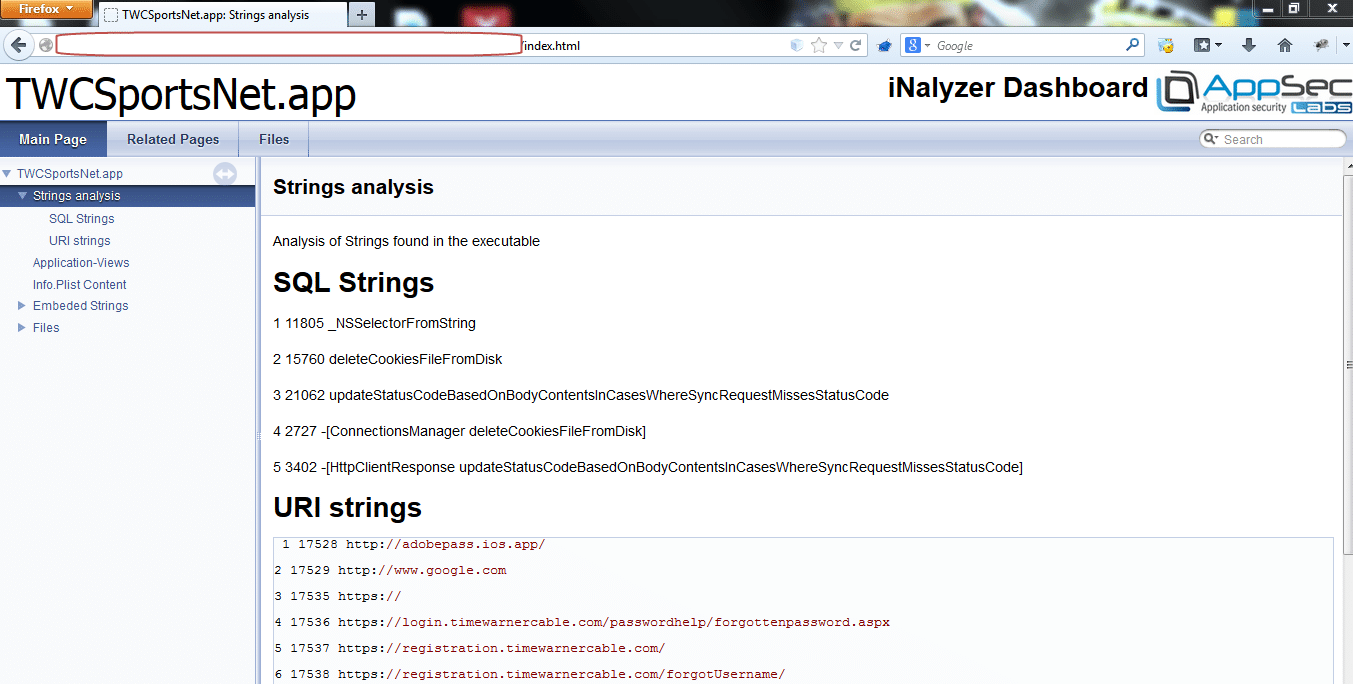
Fig 1: Showing iNalyzer output for the TWCSportsNet application.
iNalyzer helps in interacting with applications by dynamically and invoking methods. It uses Cycript as the base to do so. However, I was not able to perform any dynamic interaction with the application using iNalyzer. I used a different tool called Snoop-It to interact and invoke different methods.
Snoop-it
Snoop-it is an amazing tool developed by Neso Labs. It is used to perform comprehensive dynamic analysis. We can trace and manipulate internal state and the processing logic of iOS application. We can install Snoop-it by adding the https://repo.nesolabs.de/ repository via Cydia on a Jailbroken device.
Snoop-it has various features within it such as avoiding detection of a jailbroken iOS device.
Most of the applications detect jailbroken devices by looking for common paths like the Cydia installation directory (/Applications/Cydia.app) or /private/var/stash. Normal methodology without using any new tools like iNalyzer or Snoop-it would consist of identifying the functionality which detects jailbroken devices, and then performs function hooking using MobileSubstrate tweak.
Bypass jailbreak detection:
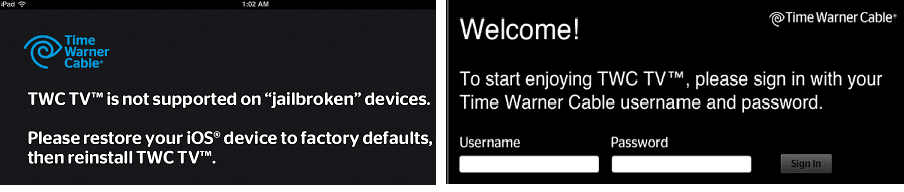
Fig. 2: Before and After using Snoop-It
Analyzing Objective-C Classes.
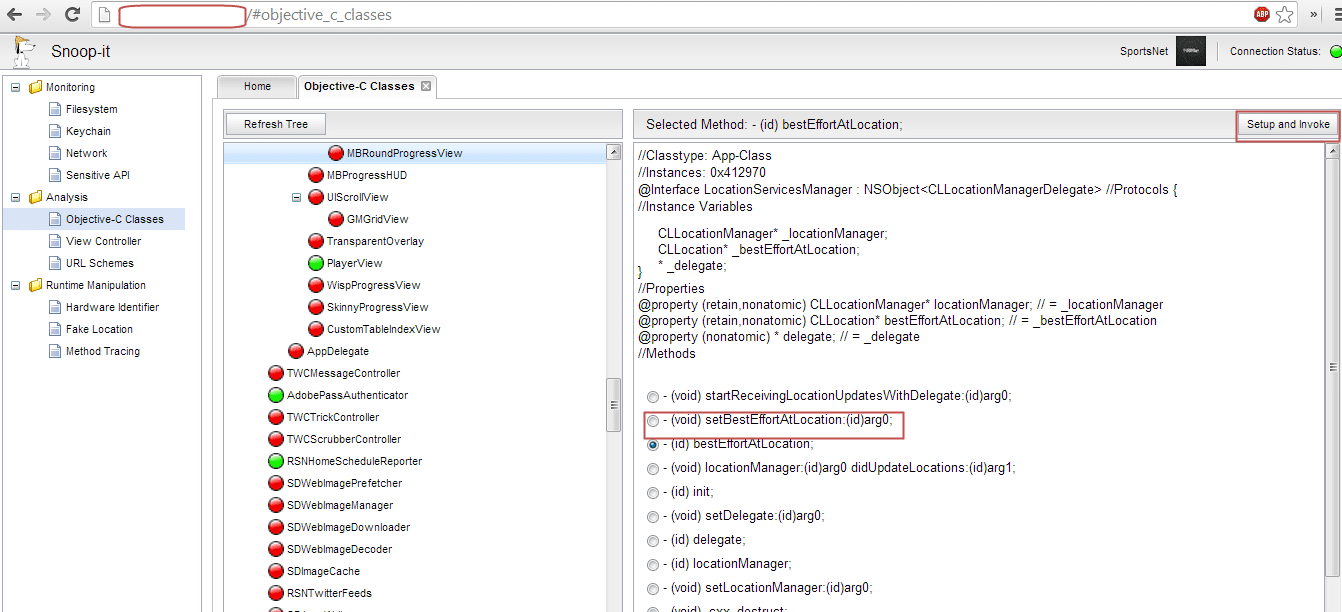
Fig 3: BestEffortLocation method contains my actual latitude and longitude
When I looked at the class LocationServicesManager there is a BestEffortLocation method which stores my current location.
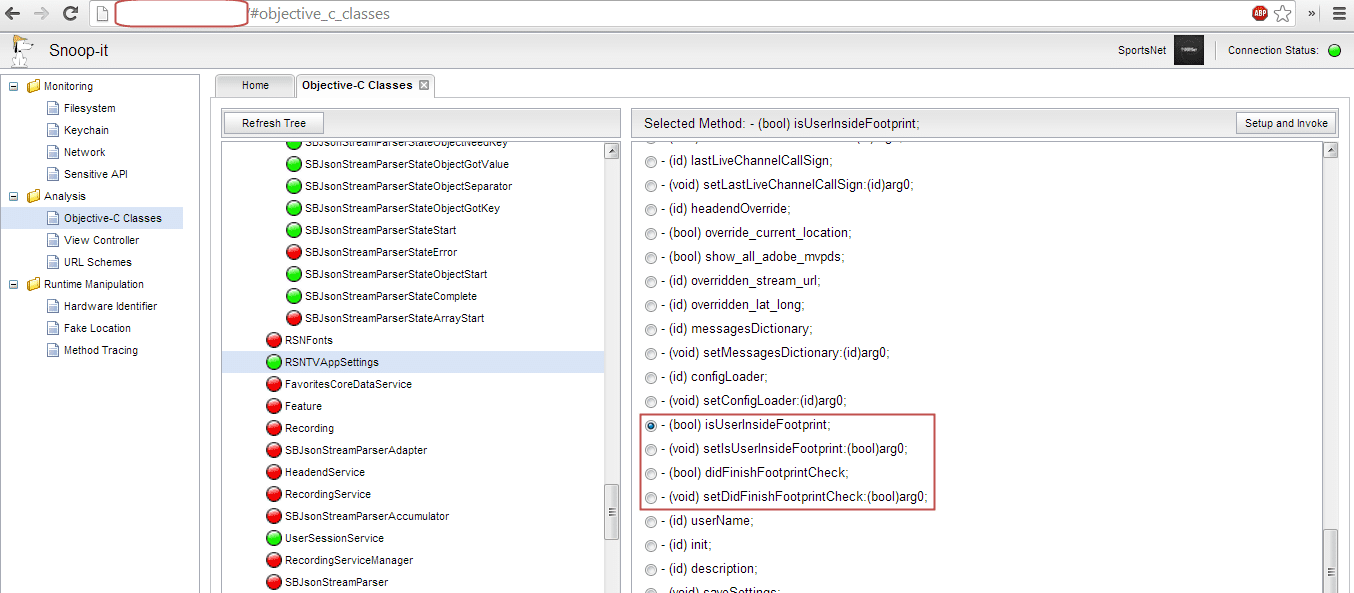
Fig 4: Function which sets a Boolean flag depending on user’s current location.
Monitor application activity via Method Tracing.
The location has been updated and sent to the server through an HTTP request which sends my current latitude and longitude. We can trace the calls and corresponding methods when any kind of activity is performed by enabling the Method Tracing functionality.

Fig 5: Longitude and latitude been send via footprint service.
Intercept the request and change the location via Burp.
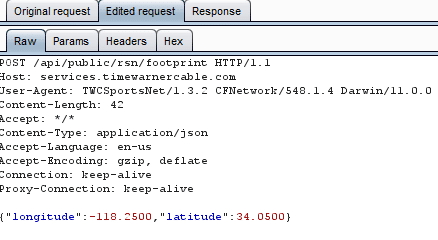
Fig 6: Intercepted and modified request using burp.
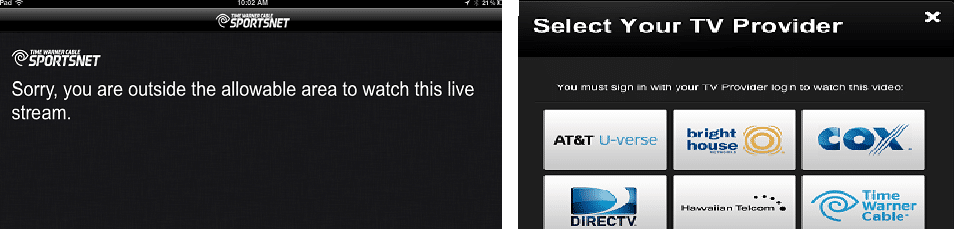
Fig. 7: Before and After changing the location
The request can be intercepted and by changing the longitude and latitude to a location in Los Angeles, we can view live television and bypass the location restriction. Although this could be performed directly via manipulation of parameters via a proxy, Snoop-it and iNalyzer gives us an in-depth view about the inner functionality of the application.
Spoof location and Fake UDID, Mac address of the device.
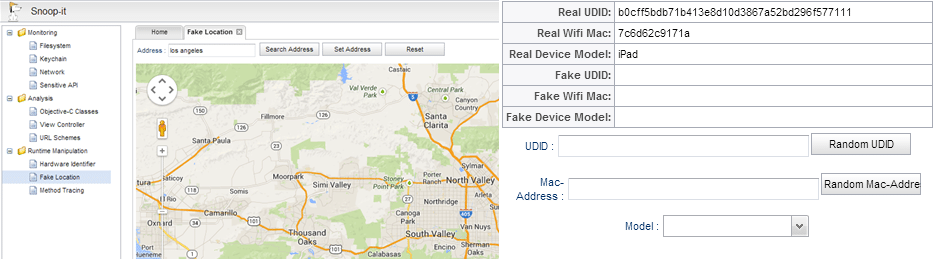
Fig 8: Fake location and fake UDID.
There are various other functionalities like monitoring the file system, checking out stored values in keychains and looking at the network traffic which can come in handy to save time during penetration testing of iOS applications.
Conclusion:
To conclude, Snoop-it and iNalyzer make reverse engineering fun and less time consuming. It gives a gray box approach to penetration testing of iOS applications.